Explore Golf Facilities at Defence Raya
This page details pricing for golf and exclusive facilities at Defence Raya Golf & Country Club. DHA Lahore, in partnership with international designers, created the Defence Raya Golf Resort—a prestigious joint venture with Bandar Raya Developments Berhad, Malaysia, to enrich communities with unparalleled lifestyle experiences.
Key Features
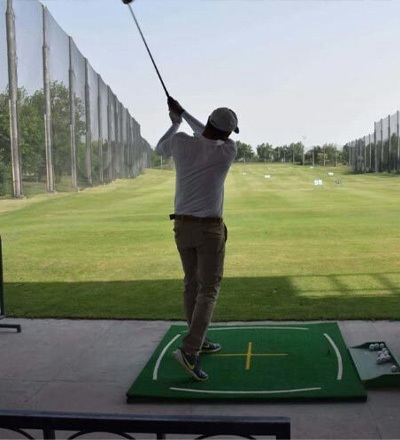
Practice Facility
Defence Raya Golf Club has facilities for improving every aspect of your game. Tune your swing at our 11 stall driving range. Refine your short game on our elevated chipping green with a bunker and spacious putting green.
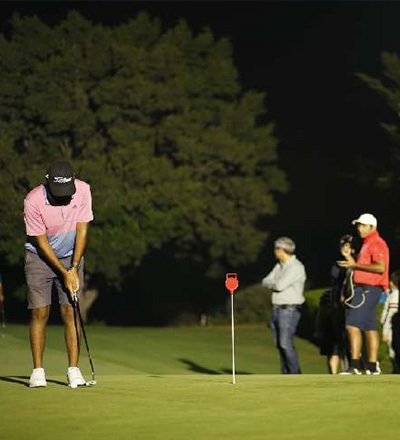
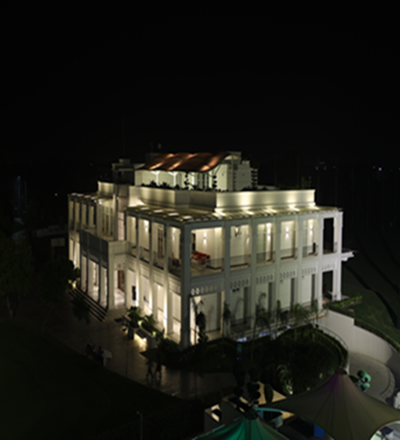
Picture Gallery
Checkout our elite vibe & ambiance.

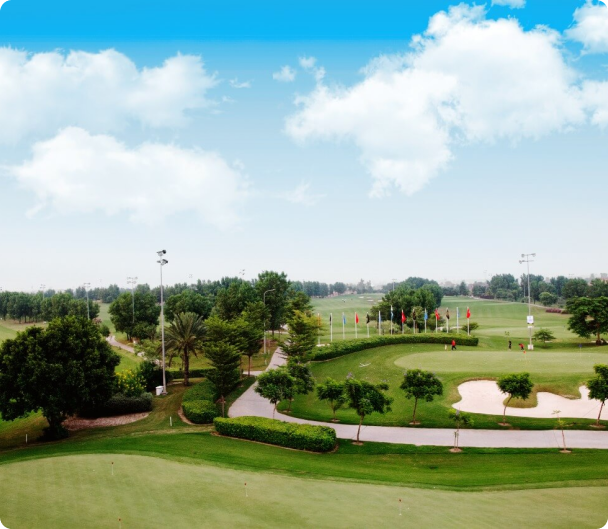
Tournament
Perfect for Tournaments and Memorable Occasions
Located in DHA Phase 6, Defence Raya Golf Club offers championship play with four tee sets, accommodating up to 144 golfers. Renowned for its picturesque course and exceptional dining, it's the perfect venue for tournaments, whether for family, friends, or business clients. With rolling Bermuda fairways and tiff dwarf greens, our course guarantees a challenge for all skill levels.
Golf Course
Map Of Golf Course
Our Golf course features a Nelson & Haworth-designed course, offering a challenging experience for all skill levels.
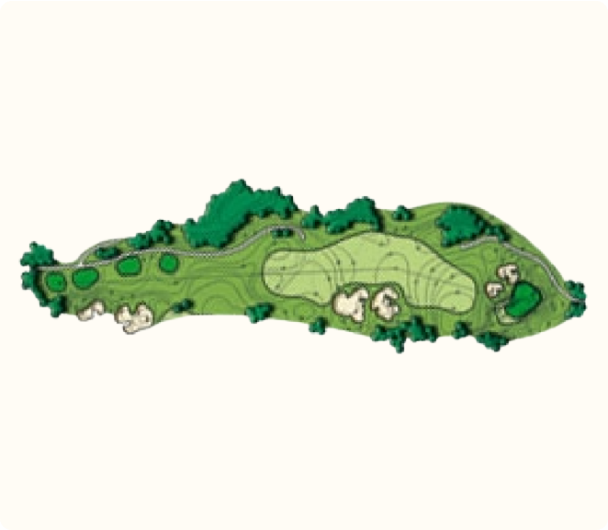
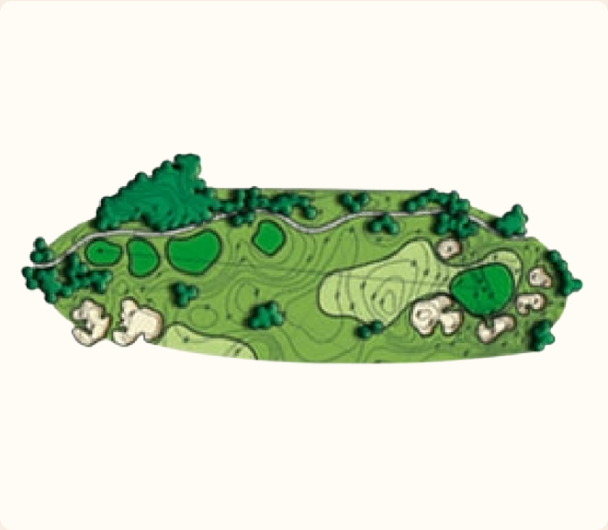
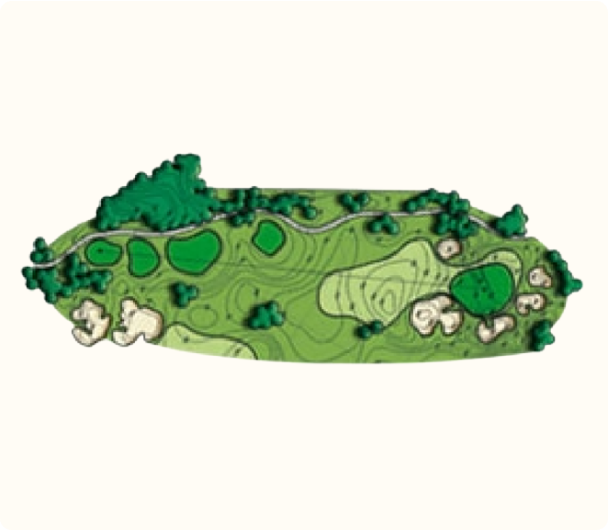
Hole 1
A medium-length par 4, the 1st is a gentle opening to the round. The tee shot needs to clear a low area and skirt two large bunkers on the right for a clear shot into the elevated but well-protected green.
Hole Details
- 390 Yards Part 4
- 375 Yards Part 4
- 355 Yards Part 4
- 300 YardsPart 4
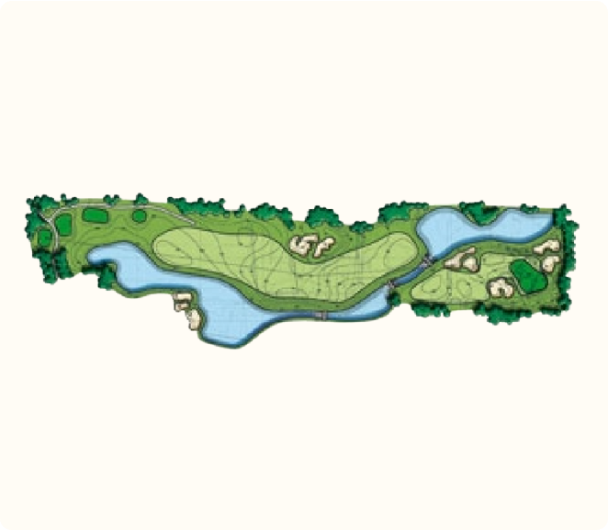
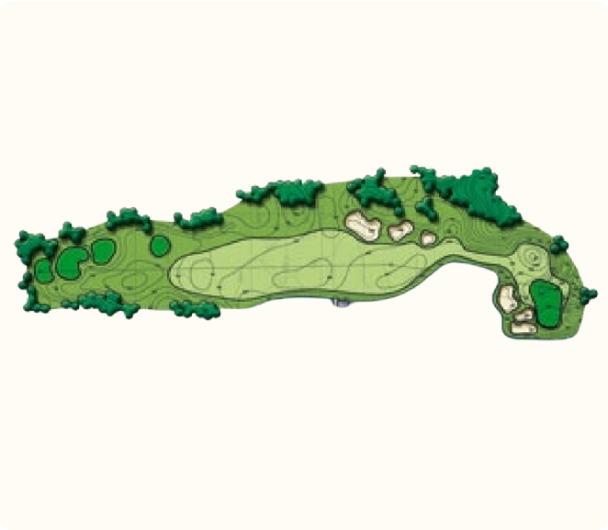
Hole 2
A short 5, the 2nd is an opportunity to pick up a birdie early in the round. The drive is fairly straightforward, with a lake and flanking bunkers clearly in view and to be avoided. Decisions need to be made on the second shot, especially for longer hitters who have a real chance of getting on in two.
Hole Details
- 520 Yards Part 4
- 505 Yards Part 4
- 475 Yards Part 4
- 430 YardsPart 4
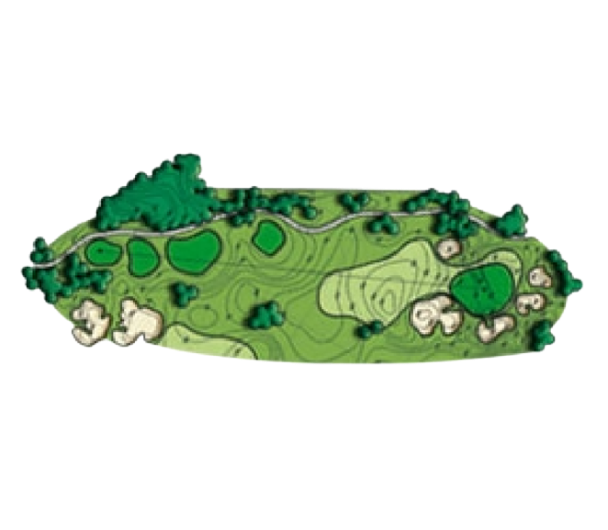
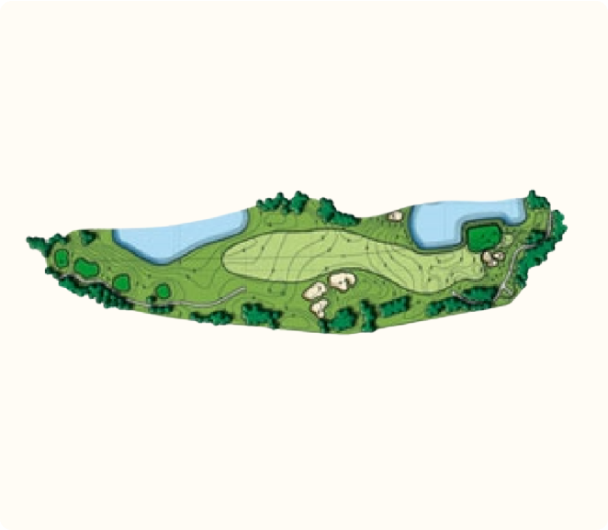
Hole 3
Another birdie chance for longer hitters, with an inviting view downhill from the tees to the landing area. The complete hole can be seen from the elevated tees, from the wide and inviting fairway to the somewhat daunting approach to the well-protected green.
A medium-length par 4, the 1st is a gentle opening to the round. The tee shot needs to clear a low area and skirt two large bunkers on the right for a clear shot into the elevated but well-protected
Hole Details
- 420 Yards Part 4
- 400 Yards Part 4
- 370 Yards Part 4
- 325 Yards Part 4
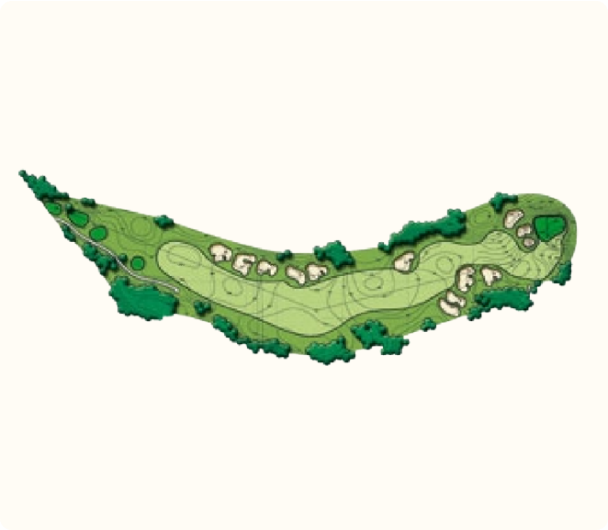
Hole 4
From the back tees, this is a brute of a par 3, though expansive and multiple tees provide opportunities to considerably vary the length of the hole for all players. The green sits down low in a small hollow and is open in front to accept a running approach shot which may well be the shot of choice for many golfers.
Hole Details
- 235 Yards Part 4
- 215 Yards Part 4
- 185 Yards Part 4
- 140 YardsPart 4
Hole 5
The longer of the two par 5’s on the front nine, the view from the tee at the 5th is both expansive and inviting, especially for players who favour a draw. The hole rolls up and around to the left off the tee with flanking bunkers marching down the left of the hole to discourage overly aggressive play. The best drives will either flirt with the bunkers or move strongly right to left for the additional yardage such a draw shot bestows.
Hole Details
- 535 Yards Part 4
- 515 Yards Part 4
- 485 Yards Part 4
- 440 YardsPart 4

Hole 6
Water again comes into play on the 6th, with the green closely bordering a lake along its left edge. The drive on this hole should be down the centre or just to the right side of the fairway for the ideal angle into the green.
Hole Details
- 430 Yards Part 4
- 410 Yards Part 4
- 370 Yards Part 4
- 330 Yards Part 4
Hole 7
A dramatic and challenging par 3, the 7th requires a long carry from elevated tees over a lake and several cavernous bunkers to a generous but well- contoured green. The green is open in front to accept pitch shots from the wide fairway area short of the green. This will be one of the more photographed holes on the course.
Hole Details
- 205 Yards Part 4
- 200 Yards Part 4
- 180 Yards Part 4
- 110 Yards Part 4

Hole 8
A short uphill par 4, the 8th is an opportunity to secure one last birdie before the rigours of the 9th hole. The green is a plateau, simple and receptive, but also surrounded by steep grassy slopes which may propel your ball some 20 feet below the level of the green.
Hole Details
- 375 Yards Part 4
- 355 Yards Part 4
- 330 Yards Part 4
- 295 YardsPart 4
Hole 9
The longer of the two par 5’s on the front nine, the view from the tee at the 5th is both expansive and inviting, especially for players who favour a draw. The hole rolls up and around to the left off the tee with flanking bunkers marching down the left of the hole to discourage overly aggressive play. The best drives will either flirt with the bunkers or move strongly right to left for the additional yardage such a draw shot bestows.
Hole Details
- 535 Yards Part 4
- 515 Yards Part 4
- 485 Yards Part 4
- 440 Yards Part 4


Hole 10
A relatively easy opener, the 10th is a medium length par 4 featuring a generously wide fairway. Drives are best kept to the right side of the fairway to open up the approach into the elevated and well-guarded green. Simple and straightforward, this hole should yield many pars.
Hole Details
- 375 Yards Part 4
- 355 Yards Part 4
- 315 Yards Part 4
- 270 Yards Part 4
Hole 11
Featuring a large and well-contoured green, the 11th is a long and difficult challenge early in the round. Most amateurs will require long irons to reach the green. The green is multi-levelled and divided by a strong internal ridge that separates right and left pin positions, so tee shots need to find the right side of the green to avoid 3-putt territory.
Hole Details
- 190 Yards Part 4
- 170 Yards Part 4
- 140 Yards Part 4
- 115 Yards Part 4

Hole 12
From elevated tees, the best drive on this short par 5 is down the left side flirting with the series of cavernous bunkers there. An elevated landing area opens up the view to the small green perched up some 20 feet above its surrounds.
Hole Details
- 535 Yards Part 4
- 515 Yards Part 4
- 485 Yards Part 4
- 445 Yards Part 4
Hole 13
From the back tees, this hole will be a difficult challenge for even accomplished golfers, but a range of teeing grounds provides a reasonable challenge to all. The fairway chokes down at around 280 yards off the tee, so longer hitters need to be very accurate as well.
Hole Details
- 440 Yards Part 4
- 415 Yards Part 4
- 375 Yards Part 4
- 230 Yards Part 4

Hole 14
Tough, long and dramatic sums up this very long par 4.
The 14th is a very tough mid-round challenge to everyone’s scorecard. From the elevated tees, the landing area appears pinched between lake and bunkers, and really long hitters may need to hang back a little to avoid entrapment in the sand.
Hole Details
- 480 Yards Part 4
- 460 Yards Part 4
- 435 Yards Part 4
- 385 Yards Part 4
Hole 15
A medium length par 4, the main complicating factor on hole 15 is the pronounced diagonal ridge running left to right that strongly affects the drive. A number of bunkers sit in this ridge and must be carried for the most ideal approach to the relatively large green.
Hole Details
- 390 Yards Part 4
- 375 Yards Part 4
- 355 Yards Part 4
- 295 Yards Part 4

Hole 16
A good chance to get a lost stroke back, the short par 4 16th is the last very good birdie chance in the round. Short in length, the fairway is still generous in width, although the challenges increase with each additional yard of driving distance.
Hole Details
- 340 Yards Part 4
- 320 Yards Part 4
- 300 Yards Part 4
- 255 Yards Part 4
Hole 17
The 17th is a very attractive and classical looking golf hole. Of medium length, it is well-protected at the front and side by deep bunkers. For most players, the lake (which is some 20 yards from the green surface) should be out of play, although it does add to the aesthetics of the hole.
Hole Details
- 195 Yards Part 3
- 175 Yards Part 3
- 170 Yards Part 3
- 145 Yards Part 3


Hole 18
In these days of 5 iron second shots into par 5’s, the 18th is a true 3 shot par 5 for all but the John Daly’s among us. The challenge is clear from the tee, where a wide fairway beckons. Getting a good, solid and preferably really long drive away is important if par is to be achieved.
Hole Details
- 600 Yards Part 5
- 585 Yards Part 4
- 550 Yards Part 4
- 500 Yards Part 4
Golf Cart Usage Rate
| Golf Cart Usage | Charges | Tax 16% | Net Total |
|---|---|---|---|
| Old Buggies 9 Holes | 1724 | 276 | 2,000 |
| Old Buggies 18 Holes | 3448 | 552 | 4,000 |
| New Buggies 9 Holes | 2155.17 | 345 | 2,500 |
| New Buggies 18 Holes | 4310.34 | 690 | 5,000 |
| Senior Citizens Mem (Over 65 Y) 9 Holes | 862.07 | 138 | 1,000 |
| Senior Citizens Mem (Over 65 Y) 18 Holes | 1724 | 276 | 2,000 |
Coaching Rate
| Beginner-Plan(10 Lessons)(within a month) | Range Fee | Rate | Total | Tax 16% | Net Total |
|---|---|---|---|---|---|
| Member | – | 10345 | – | 1655 | 12,000 |
| Non-Member | 5000 | 12,241 | 17,241 | 2759 | 20,000 |
| Single-Lesson (Mem) | – | 948 | – | 152 | 1,100 |
| Single-Lesson (Non-Mem) | – | 1121 | – | 179 | 1,300 |
| Course-Lesson (9 Holes) | – | 1293 | – | 207 | 1,500 |
| Course-Lesson (18 Holes) | – | 2586 | – | 414 | 3,00 |
Golf Practice Range Balls Rate
| Rate for 24 Balls | Rate | Tax 16% | Net Total |
|---|---|---|---|
| Member | 108 | 17 | 125 |
| Non – Member | 172 | 28 | 200 |
| Range Fee (Non-Mem) Mon-Sun | 862 | 138 | 1000 |
Golf Simulator
| Rate for 1 Hour | Rate | Tax 16% | Net Total |
|---|---|---|---|
| Member | 646.55 | 103 | 750 |
| Non – Member | 1293.1 | 207 | 1,500 |
Defense Raya Sub Fee
| Category | Subscription Fee | Capitation Fee | Net Total |
|---|---|---|---|
| Below 60 Years | 1500 | 150 | 1650 |
| Above 60 Years | 750 | 150 | 900 |
Lockers Charges
| Locker 1 Year | Rate | Tax 16% | Net Total |
|---|---|---|---|
| Member | 20690 | 3310 | 24000 |
9 Holes
| Days | Green Fee | Caddy Fee Normal | Insurance | Total | Tax 16% | Net Total | |
|---|---|---|---|---|---|---|---|
| Member DRGCC | Mon-Sun | – | 682.76 | 50 | 732.76 | 117.24 | 850 |
| Members DRGCC(Choice) | Mon-Sun | – | 1,415.52 | 50 | 1,465.52 | 234.48 | 1,700 |
| Members Guest | Mon-Fri | 1,336.20 | 682.76 | 50 | 2,068.96 | 331.03 | 2,400 |
| Members Guest | Sat, Sun & Public Holiday | 3,146.55 | 682.76 | 50 | 3,879.31 | 620.69 | 4,500 |
| Non – Member | Mon-Fri | 1,422.41 | 682.76 | 50 | 2,155.17 | 344.83 | 2,500 |
| Non – Member | Sat, Sun & Public Holiday | 3,405.17 | 682.76 | 50 | 4,137.93 | 662.07 | 4,800 |
| Other Club Member | Mon-Thu | 387.93 | 682.76 | 50 | 1,120.69 | 179.31 | 1,300 |
| Ladies & Children | Mon-Fri | 301.73 | 682.76 | 50 | 1,034.49 | 165.52 | 1,200 |
| Ladies & Children | Sat, Sun & Public Holiday | 1,336.21 | 682.76 | 50 | 2,068.97 | 331.03 | 2,400 |
| Senior Citizens | Mon-Thu | 560.34 | 682.76 | 50 | 1,293.10 | 206.90 | 1,500 |
| Octogenarian Men | Mon-Thu | – | – | 50 | 50.00 | 8.00 | 58 |
| Octogenarian Men | Sat, Sun & Public Holiday | – | 251.72 | 50 | 301.72 | 48.28 | 350 |
18 Holes
| Days | Green Fee | Caddy Fee Normal | Insurance | Total | Tax 16% | Net Total | |
|---|---|---|---|---|---|---|---|
| Member DRGCC | Mon-Sun | – | 1,193.10 | 100 | 1,293.10 | 206.90 | 1,500 |
| Members DRGCC(Choice) | Mon-Sun | – | 2,486.21 | 100 | 2,586.21 | 413.79 | 3,000 |
| Members Guest | Mon-Fri | 2,500 | 1,193.10 | 100 | 3,793.10 | 606.90 | 4,400 |
| Members Guest | Sat, Sun & Public Holiday | 5,862.07 | 1,193.10 | 100 | 7,155.17 | 1,144.83 | 8,300 |
| Non – Member | Mon-Fri | 3,017.25 | 1,193.10 | 100 | 4,310.35 | 689.66 | 5,000 |
| Non – Member | Sat, Sun & Public Holiday | 6,982.76 | 1,193.10 | 100 | 8,275.86 | 1,324.14 | 9,600 |
| Other Club Member | Mon-Thu | 948.28 | 1,193.10 | 100 | 2,241.38 | 358.62 | 2,600 |
| Ladies & Children | Mon-Fri | 775.87 | 1,193.10 | 100 | 2,068.97 | 331.03 | 2,400 |
| Ladies & Children | Sat, Sun & Public Holiday | 2,155.18 | 1,193.10 | 100 | 3,448.28 | 551.72 | 4,000 |
| Senior Citizens | Mon-Thu | 862.07 | 1,193.10 | 100 | 2,155.17 | 344.83 | 2,500 |
| Octogenarian Men | Mon-Thu | – | – | 100 | 100 | 16 | 116 |
| Octogenarian Men | Sat, Sun & Public Holiday | – | 460.34 | 100 | 560.34 | 89.66 | 650 |
Golf Enquiry
Book your tee time with us now!